The accounts list and creating an account
Last verified 2026-09-17
View and filter your customer portfolio, track health and churn risk, and onboard new organizations using the account creation modal in ValueRamp.
Before you start
- ValueRamp account access (CSM, Admin, or OM role)
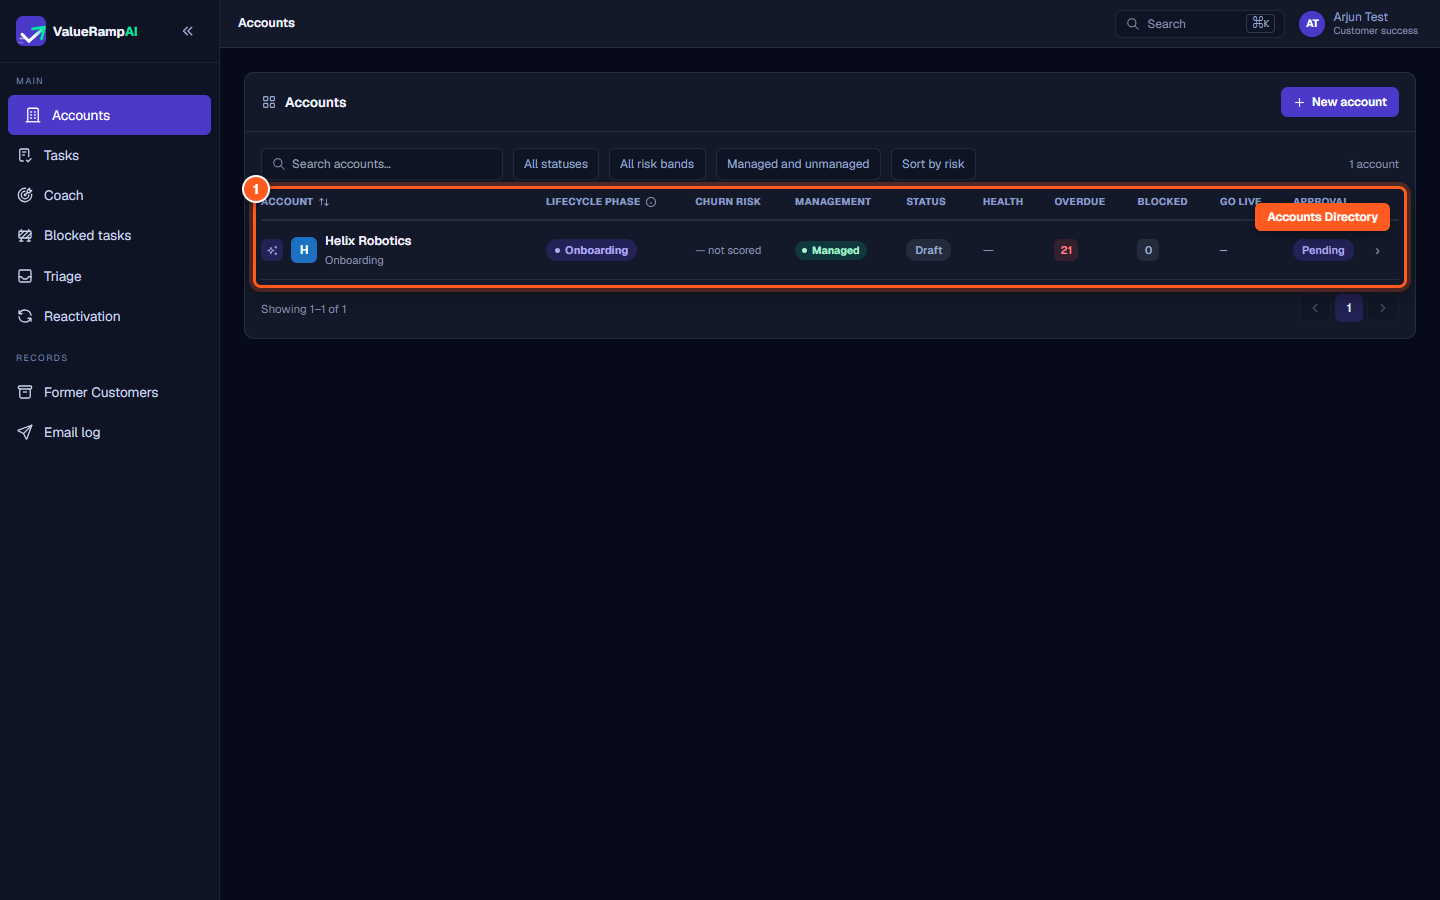
The Accounts directory (/accounts) is the central operational hub for managing your customer portfolio. It displays every active customer organization, providing real-time visibility into customer health, active lifecycle phases, churn risk scores, and deliverable progress across implementation and onboarding plans.
This guide covers how to navigate and filter the accounts directory, interpret portfolio risk indicators, and create a new customer account.
Portfolio overview and account metrics
Each row in the accounts directory represents an organization in your customer portfolio, detailing:
- Account Name & Identifier: The customer organization name and its internal reference ID.
- Lifecycle Phase: Shows where the account stands in its customer journey (Onboarding, Adoption, or Renewal).
- Churn Risk: Risk band (Critical, High, Medium, Low, or Unscored) computed from the account's health scores, usage signals, communication sentiment and champion changes.
- Management Tier: Managed or Unmanaged — whether the account is on a paid, engine-driven plan. (The separate account tier field is Standard, Core or Strategic.)
- Deliverables & Tasks: Progress indicators summarizing completed milestones, in-progress deliverables, and overdue tasks.
Step 1: Open Accounts to view your portfolio
- In the main navigation sidebar under Main, click Accounts (
/accounts). - The directory lists your portfolio of customer accounts along with lifecycle phases and health indicators.
- Click on any account row to open its comprehensive account overview page.
Step 2: Filter and sort accounts by risk and tier
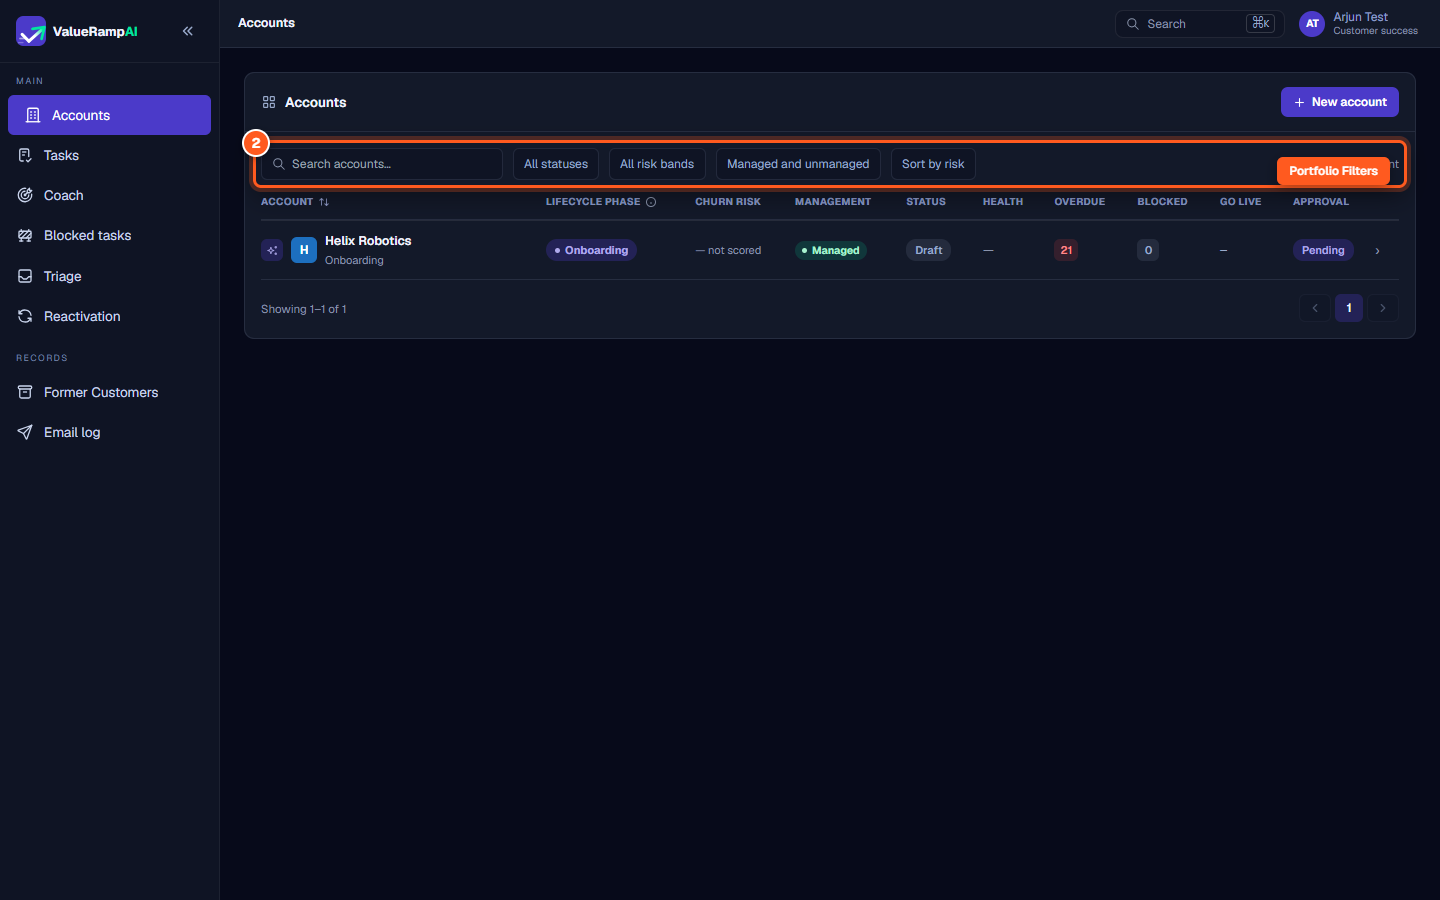
- Use the filter bar at the top of the directory to segment your portfolio:
- Status: All statuses, or Active only.
- Risk Band: Focus on accounts in Critical or High churn bands requiring urgent attention.
- Management Tier: Filter by Managed vs. Unmanaged accounts.
- Click Sort by risk to sort accounts with the highest churn scores to the top of the table.
Step 3: Click New account to launch the creation modal
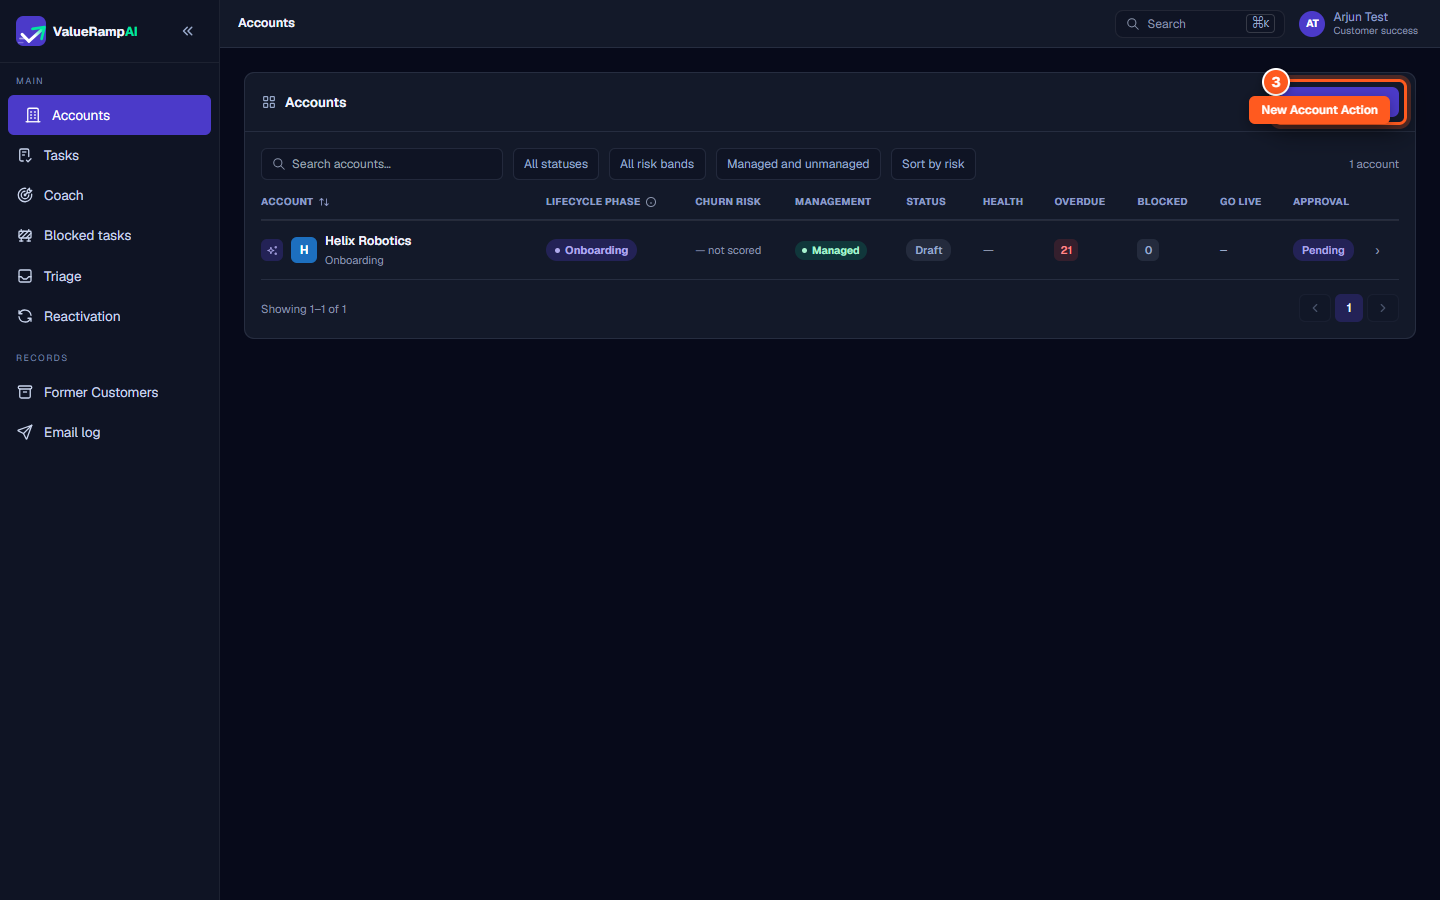
- In the top right header of the Accounts directory, locate the action buttons.
- Click New account.
- A modal dialog opens with fields to configure company profile and primary contact details.
Step 4: Enter company name and primary contact details
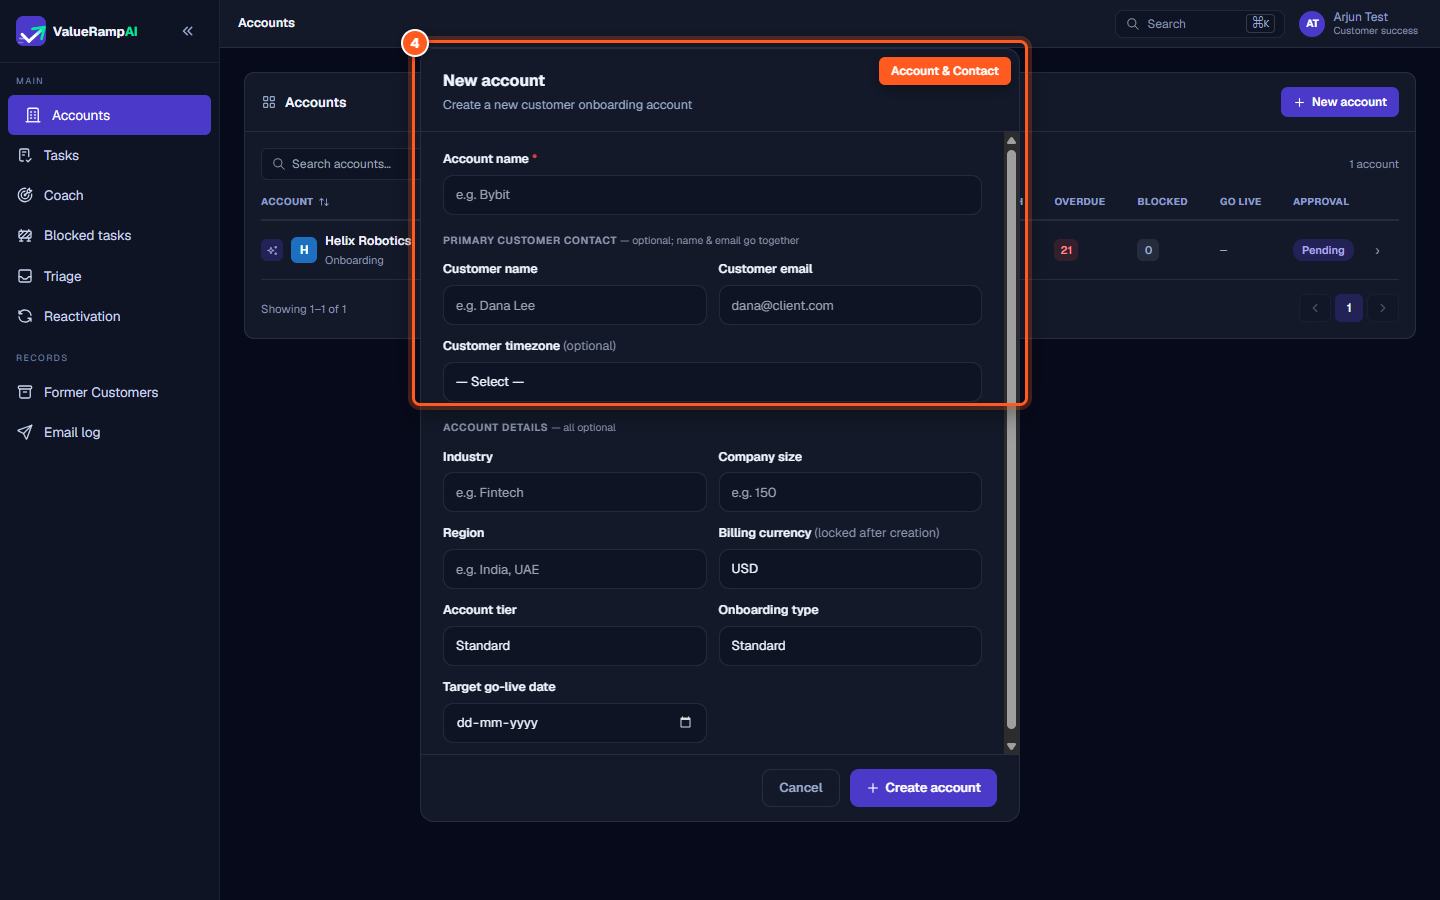
- In the Account name field, type the full corporate name of the customer organization. As an Admin, also pick the Assigned CSM (required); a CSM creating an account is assigned to it automatically.
- Under Primary contact, provide:
- Name: The full name of the key customer champion or primary operational lead.
- Email: The contact's business email address.
- Timezone: Select the customer's primary operating timezone to align communication schedules.
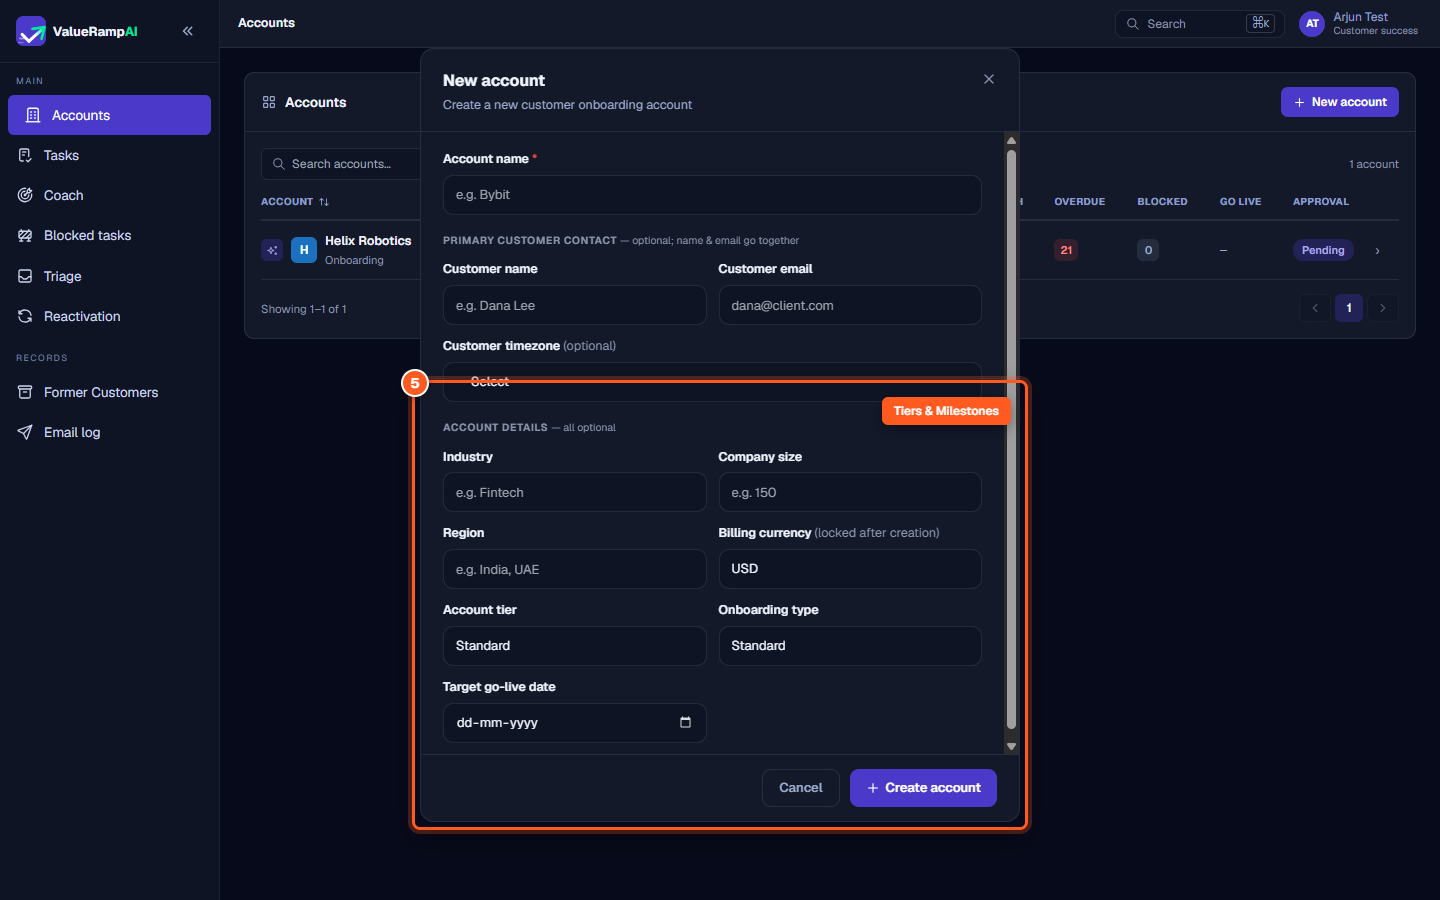
Step 5: Configure tier, currency, and target go-live date
- Set the Account tier (Standard, Core or Strategic).
- Select the Billing currency matching the customer's contract.
- Choose the Target go-live date to establish the timeline for onboarding and implementation milestones.
- Click Create account. The new account appears in the directory and its overview page opens.
Steps
Open Accounts to view customer health, lifecycle phases, and churn indicators
Filter your portfolio by risk band, onboarding state, or tier
Click New account to launch the creation modal
Enter company name, customer contact details, and timezone
Set company tier, billing currency, and target go-live date before creating
Common questions
Who can create a new customer account?
How do lifecycle phases change for an account?
What does 'Sort by risk' do?
Was this helpful? Tell us what was missing