Onboard a new customer account
Last verified 2026-09-17
Create a new customer account in ValueRamp, assign an owner, review sales handoff notes, and launch the customer's onboarding plan.
Onboarding is the initial customer phase where customer expectations are translated into active delivery milestones. ValueRamp structures account setup so Customer Success Managers (CSMs) and Onboarding Managers (OMs) can immediately access sales context, align on deliverables, and monitor project timelines.
This guide walks through creating an account, reviewing sales context, and initializing the customer's onboarding roadmap.
The onboarding lifecycle
- Initial Account Creation: When an account is created, ValueRamp automatically initializes its lifecycle phase to Onboarding.
- Owner Attribution: Assigning a CSM establishes the primary operational contact responsible for customer health, delivery milestones, and relationship management.
- Context Continuity: The Sales Handoff tab bridges the transition from closed-won opportunity to delivery, recording commitments made during pre-sales.
- Milestone Execution: Active deliverables, implementation phases, and go-live targets are organized within structured plans on the Plans tab.
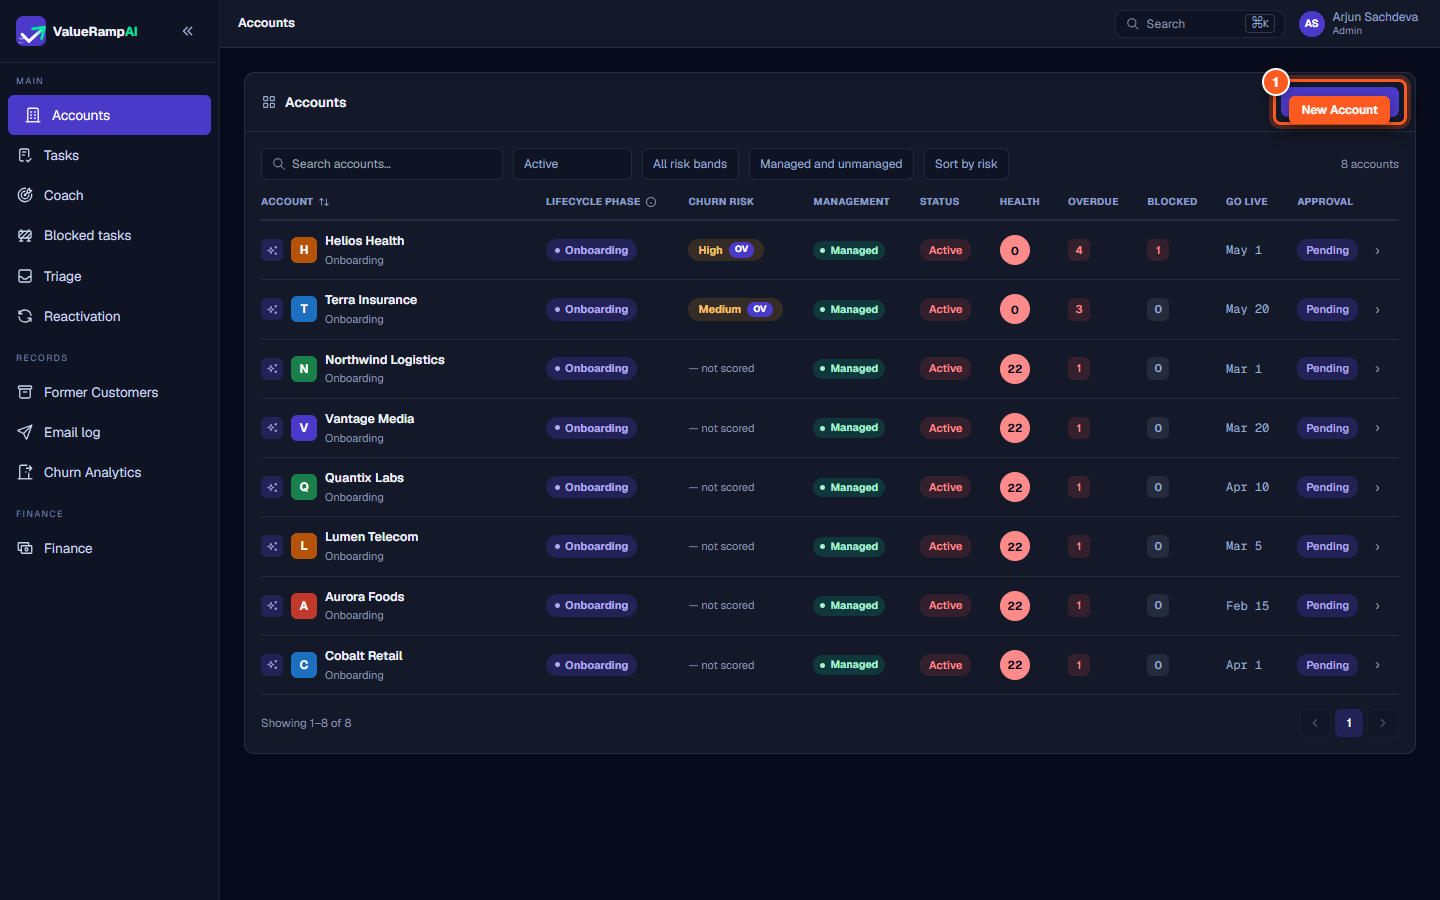
Step 1: Open Accounts and click New account
- In the left navigation sidebar under Main, click Accounts (
/accounts). - The Accounts directory displays all organizations in your workspace, including their current lifecycle phase, health score, and assigned CSM.
- In the upper-right corner of the table header, click the purple New account button.
Step 2: Configure company details and primary contact
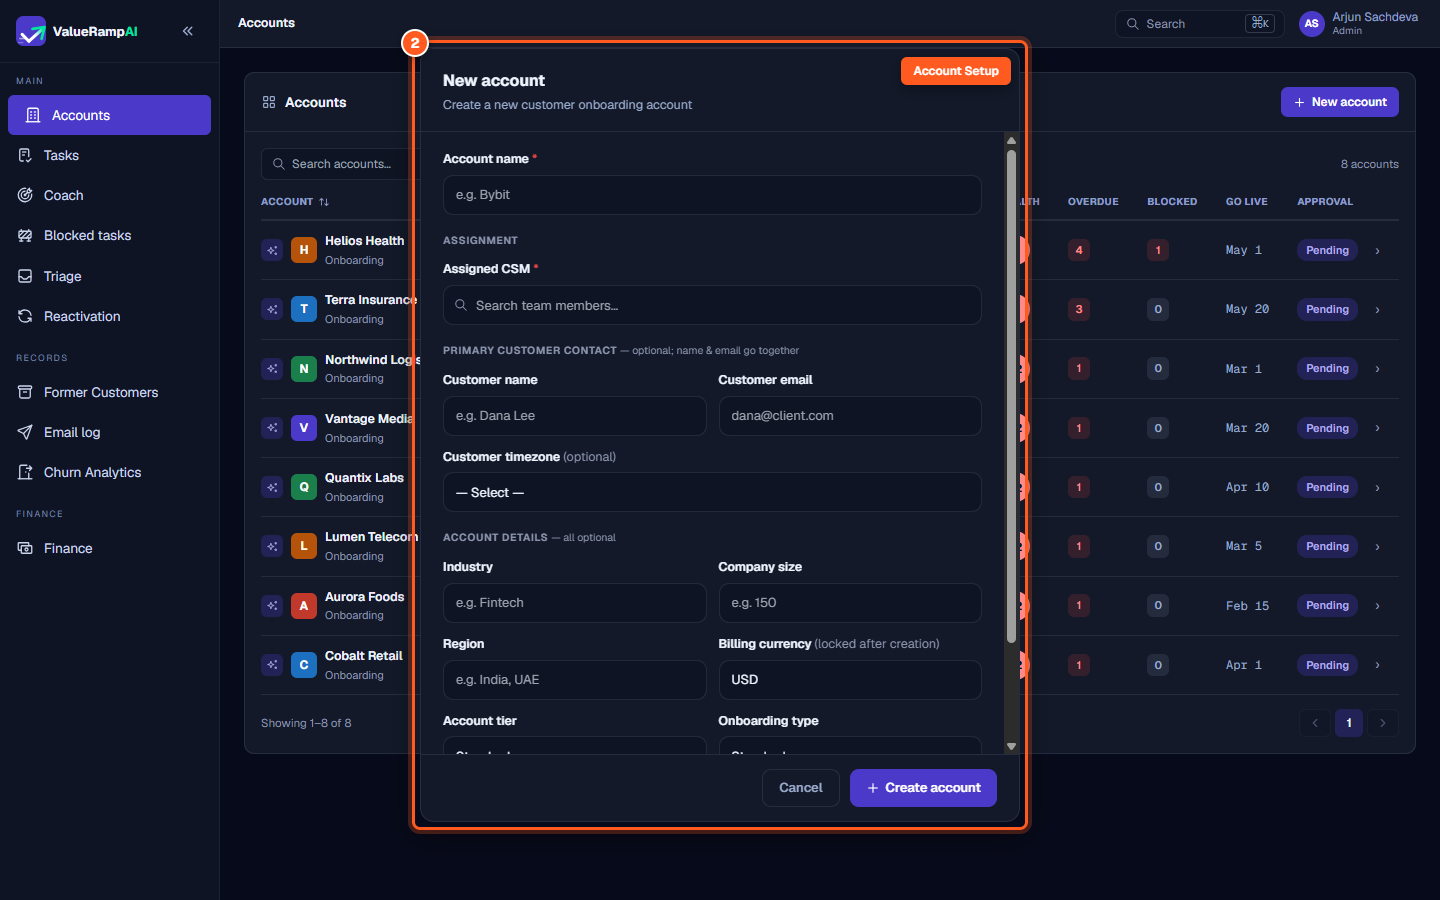
In the New account modal:
- Account name *: Enter the formal organization or company name (e.g. Helios Health).
- Assigned CSM *: Search and select the team member who will own the account relationship.
- Primary Customer Contact:
- Customer name: Enter the main sponsor or project lead (e.g. Dana Lee).
- Customer email: Provide their business email address.
- Customer timezone (optional): Select the customer's primary working timezone so emails to this customer go out in their working hours.
- Account Details (optional):
- Enter industry vertical, company size, and geographic operating regions.
- Select the Billing currency (locked after account creation).
- Choose the Account tier (Standard, Core, or Strategic) and Onboarding type (Standard, Enterprise, or Self-serve).
- Click + Create account to create the customer record.
Step 3: Verify the Onboarding phase and account metrics
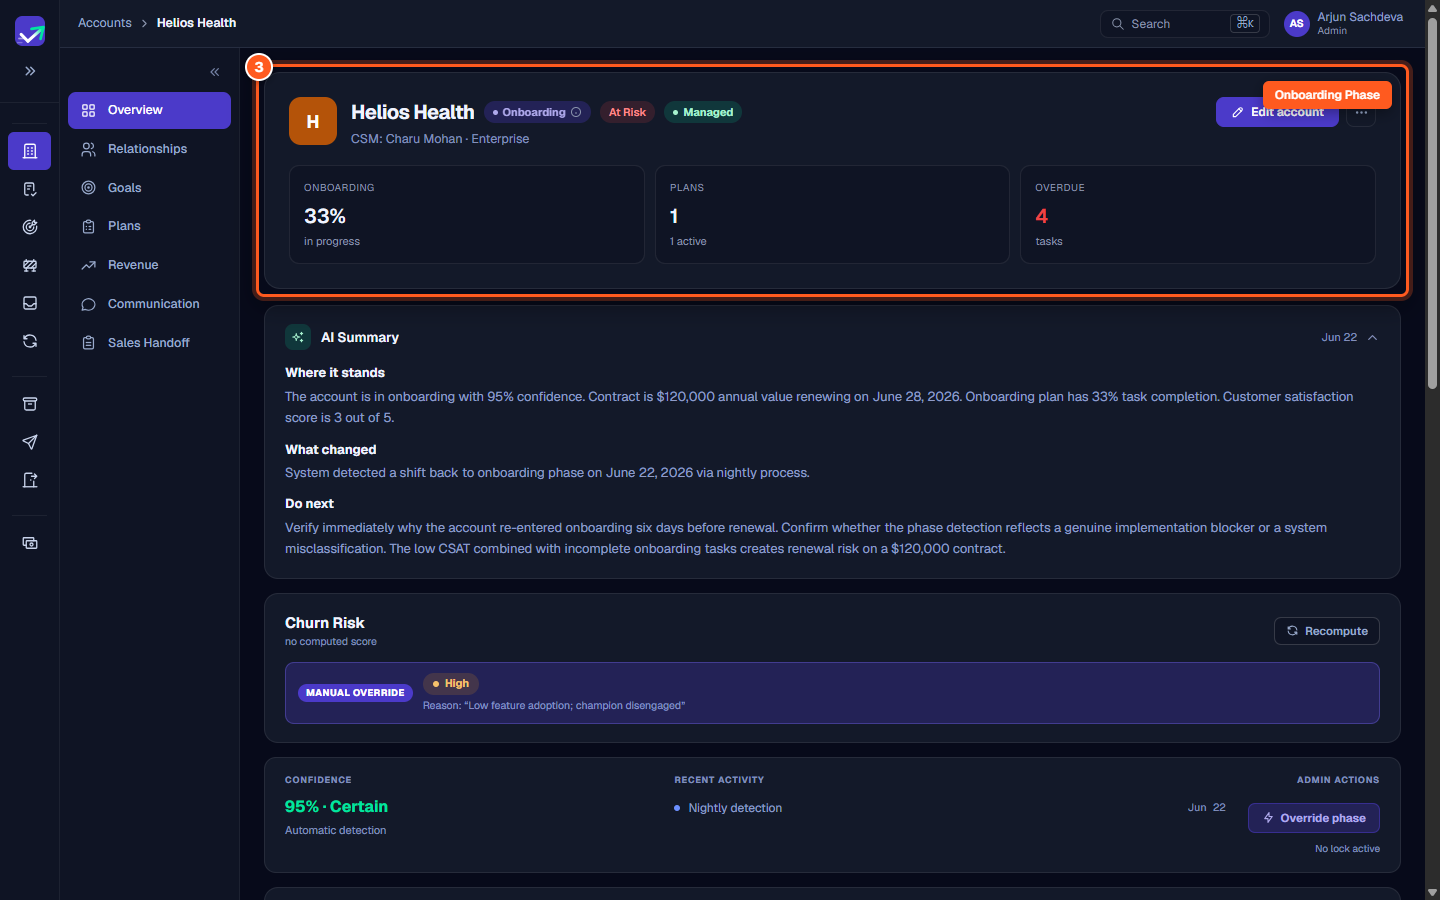
- ValueRamp navigates to the newly created account overview (
/accounts/[id]). - The top account header displays:
- Lifecycle Phase Pill: Marked as Onboarding.
- Owner and Tier: Displays the assigned CSM and customer tier.
- Onboarding Progress: Tracks completion percentage across all required onboarding tasks (starts at
0%). - Plans Count: Summarizes active customer plans.
- Overdue Count: Flags tasks requiring immediate team attention.
Step 4: Review Sales Handoff context and commitments
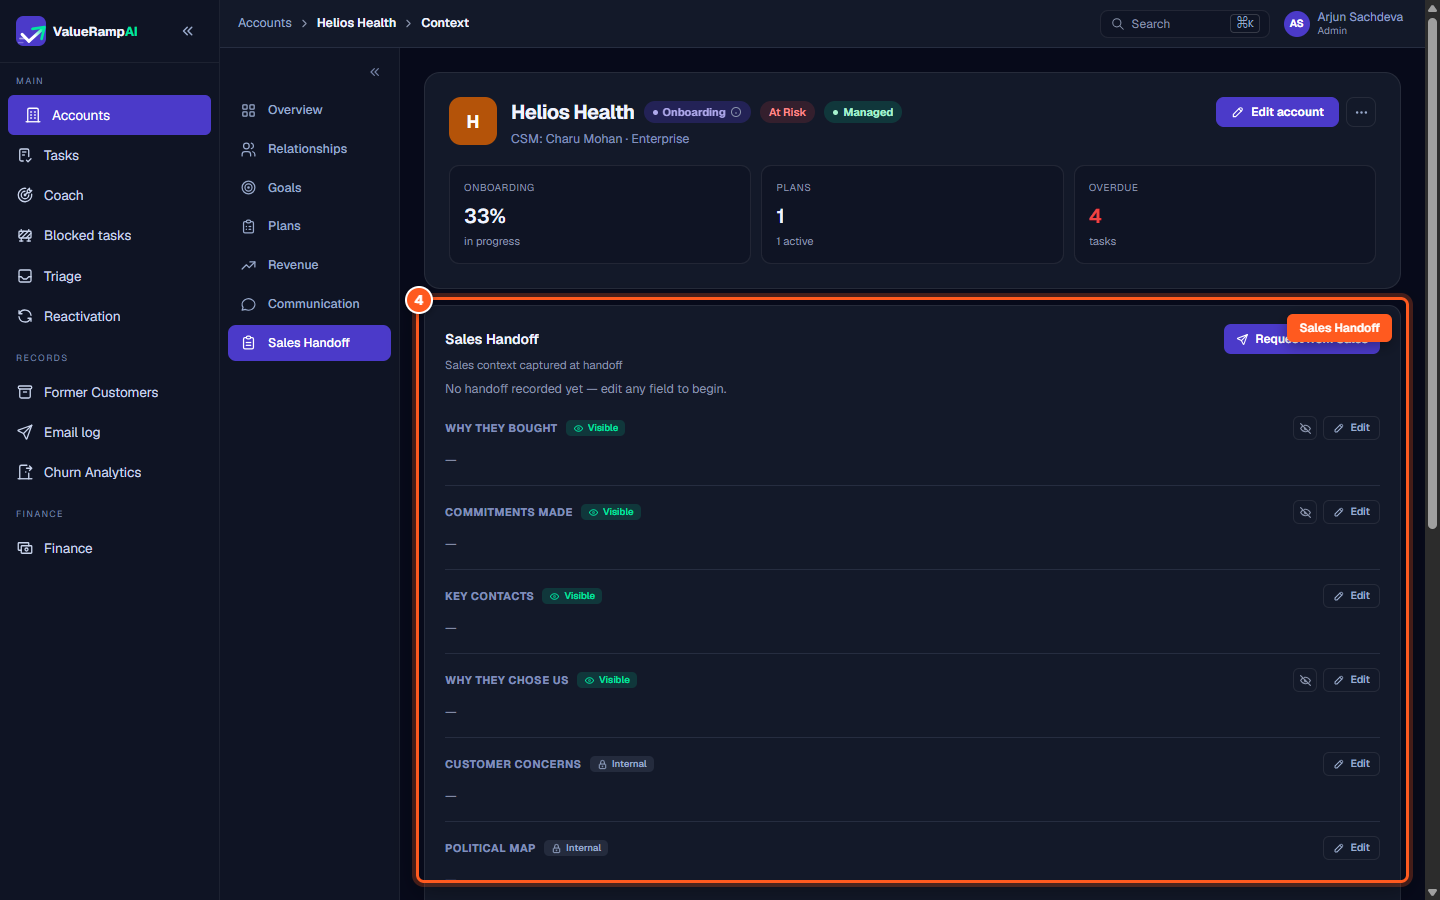
- In the account sub-navigation, click the Sales Handoff tab (
/accounts/[id]/context). - Review structured handover fields captured from the sales motion:
- Why they bought: Core business problems the customer purchased ValueRamp to solve.
- Commitments made: Feature promises, customized SLAs, or agreed implementation timelines.
- Key contacts: Stakeholders identified during contract negotiations.
- Customer concerns: Potential objections, security flags, or adoption risks.
- If the deal owner did not complete the handoff submission, click Request from Sales to trigger an automated notification prompting the sales rep to provide context.
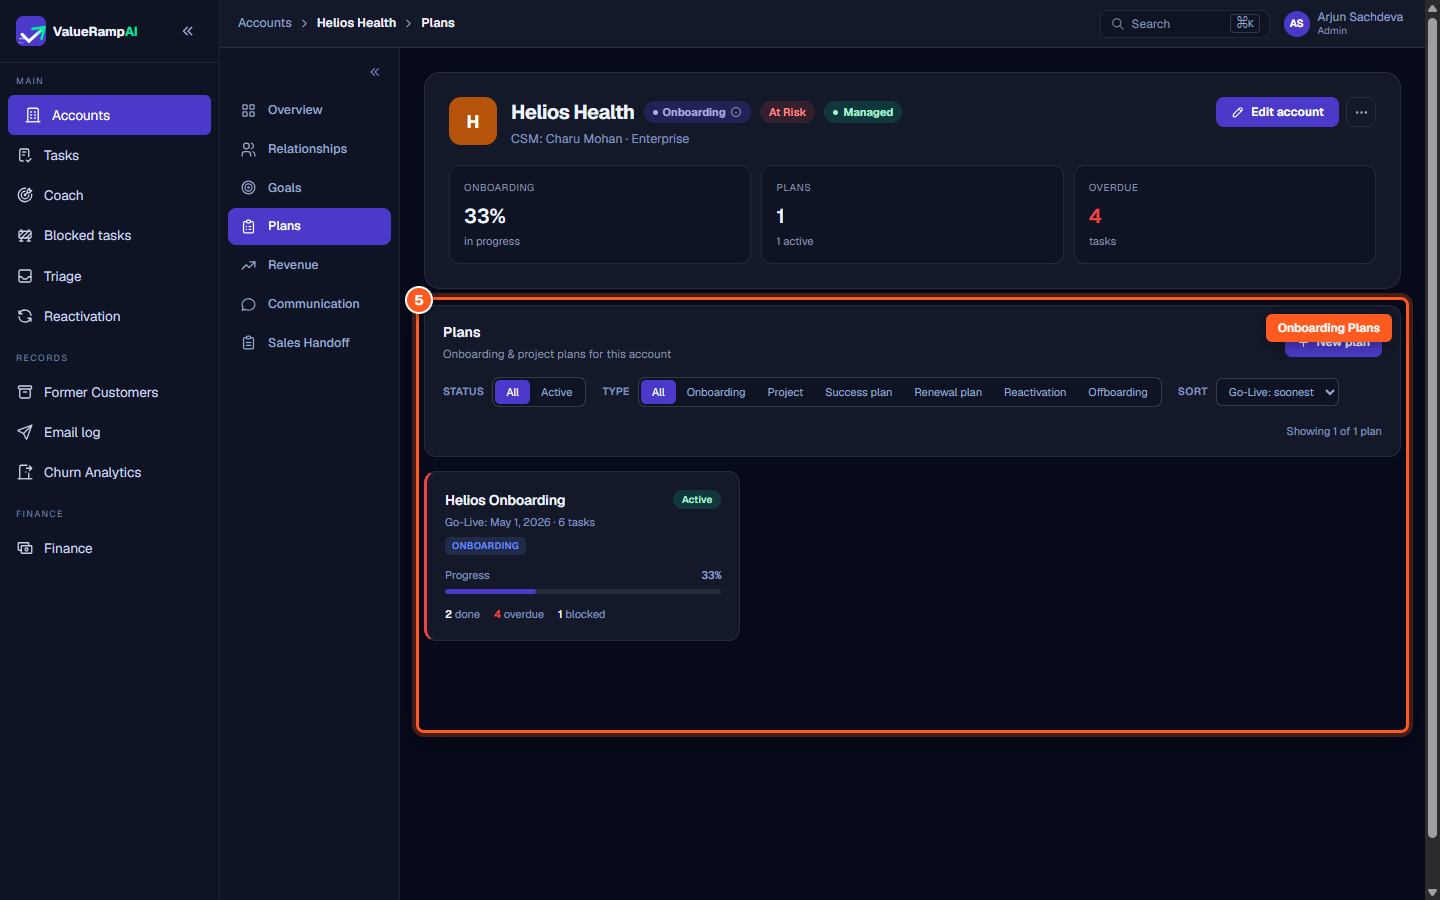
Step 5: Establish the onboarding plan and milestones
- In the account sub-navigation, click the Plans tab (
/accounts/[id]/plans). - ValueRamp displays existing plans associated with the account.
- To start a new roadmap:
- Click + New plan to create a custom implementation plan or apply a saved blueprint template (from Automation → Plan Templates).
- Set the planned Target Go-Live Date.
- Assign tasks across phases (such as Kickoff, Technical Integration, Data Migration, and Training).
- As your team completes checklist items, the Onboarding progress percentage updates automatically in the account header.
Frequently asked questions
Can an account's assigned CSM be updated later?
Yes. Click Edit account in the upper-right corner of the account header at any time to reassign the CSM, update company metadata, or change the account tier.
When does an account leave the Onboarding phase?
An account leaves Onboarding when its onboarding plan is closed (Closed, Closed with CSAT, or Closed without CSAT); while that plan is open the account stays in Onboarding. Admins can also manually transition an account's phase using Override phase under Admin Actions on the account overview page.
How do I invite the customer's team to collaborate on the plan?
Navigate to the Relationships tab (/accounts/[id]/relationships) and click Add stakeholder. You can provide the customer with view-only or full interactive portal access so they can complete client-side tasks.
Steps
Open Accounts and click New account to initialize customer setup
Fill in company details, assign an account owner, and enter primary contact details
Verify account lifecycle phase and onboarding progress tracking
Review sales context and handoff notes from the deal cycle
Open Plans to track onboarding milestones, phases, and kickoff deliverables
Was this helpful? Tell us what was missing