Set up single sign-on for your team
Last verified 2026-09-24
Configure enterprise single sign-on (SAML 2.0 or OIDC) with automated DNS domain verification, live connection tests, and staff enforcement policies.
Before you start
- ValueRamp Admin role
- Scale or Enterprise plan subscription
- Identity Provider administrative access (Okta, Microsoft Entra ID, Google Workspace)
- DNS management access for your organization's email domains
Single sign-on (SSO) enables your organization to centralize access management, enforce multi-factor authentication policies, and streamline team onboarding through your enterprise Identity Provider (IdP).
SSO is managed by workspace Admins under Settings → Organisation → Single sign-on (/settings/organisation/sso). Single sign-on is available on ValueRamp Scale and Enterprise subscription plans.
What you'll do
- Configure the connection: choose your protocol (OpenID Connect or SAML 2.0) and enter your identity provider's details.
- Save: saving the connection shows your domain verification token.
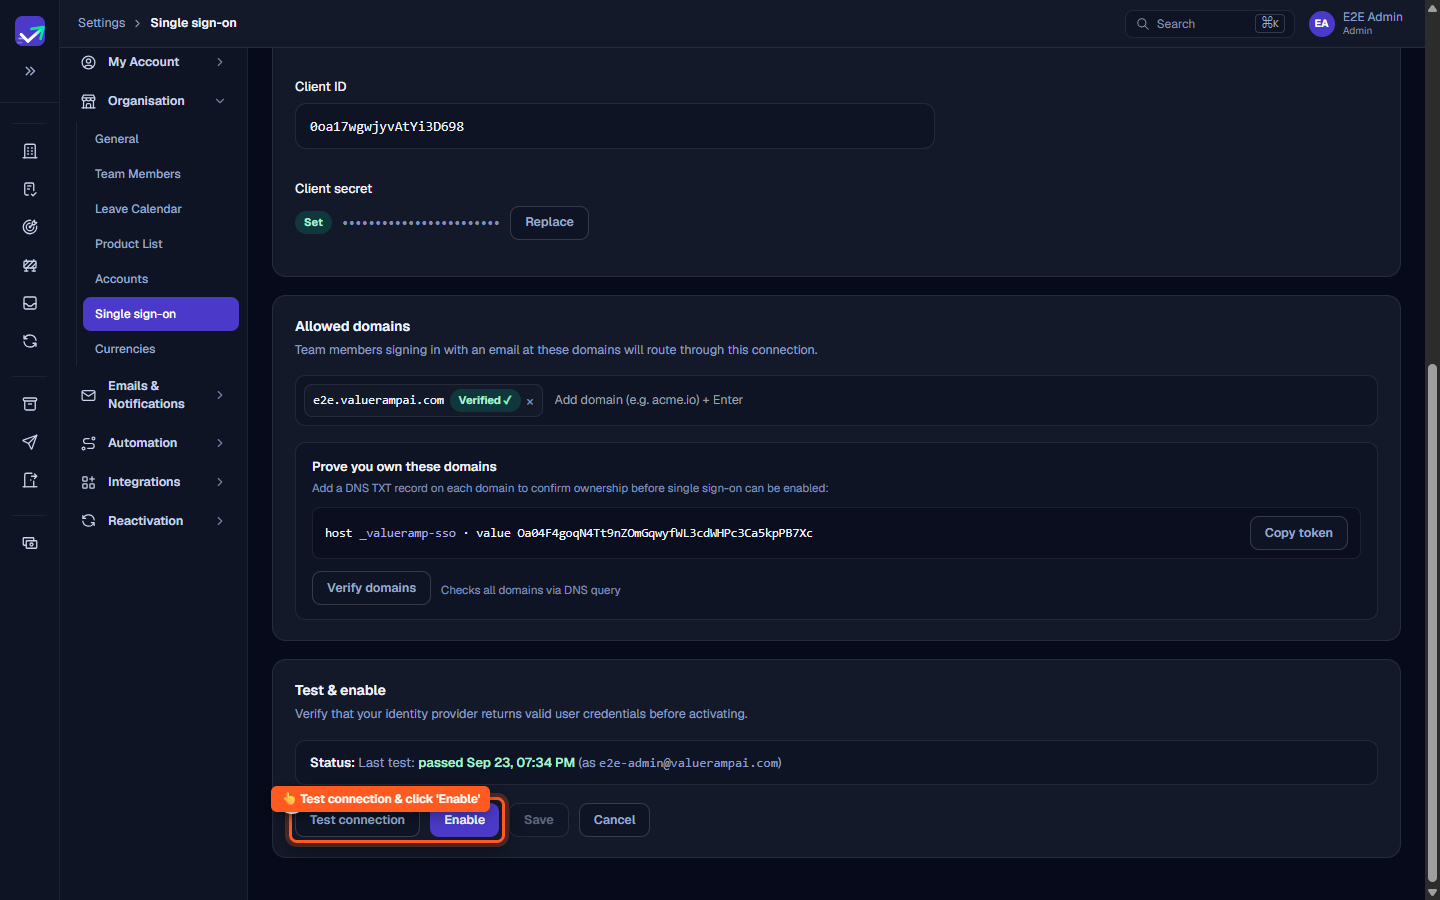
- Prove you own your domains: add a DNS TXT record to each domain, then click Verify domains.
- Test the connection: click Test connection and sign in through your identity provider.
- Enable: click Enable to turn single sign-on on.
Steps 3 and 4 can be done in either order. Enable stays unavailable until you have run a successful test after your last change and every domain is verified.
Configuring Your Identity Provider
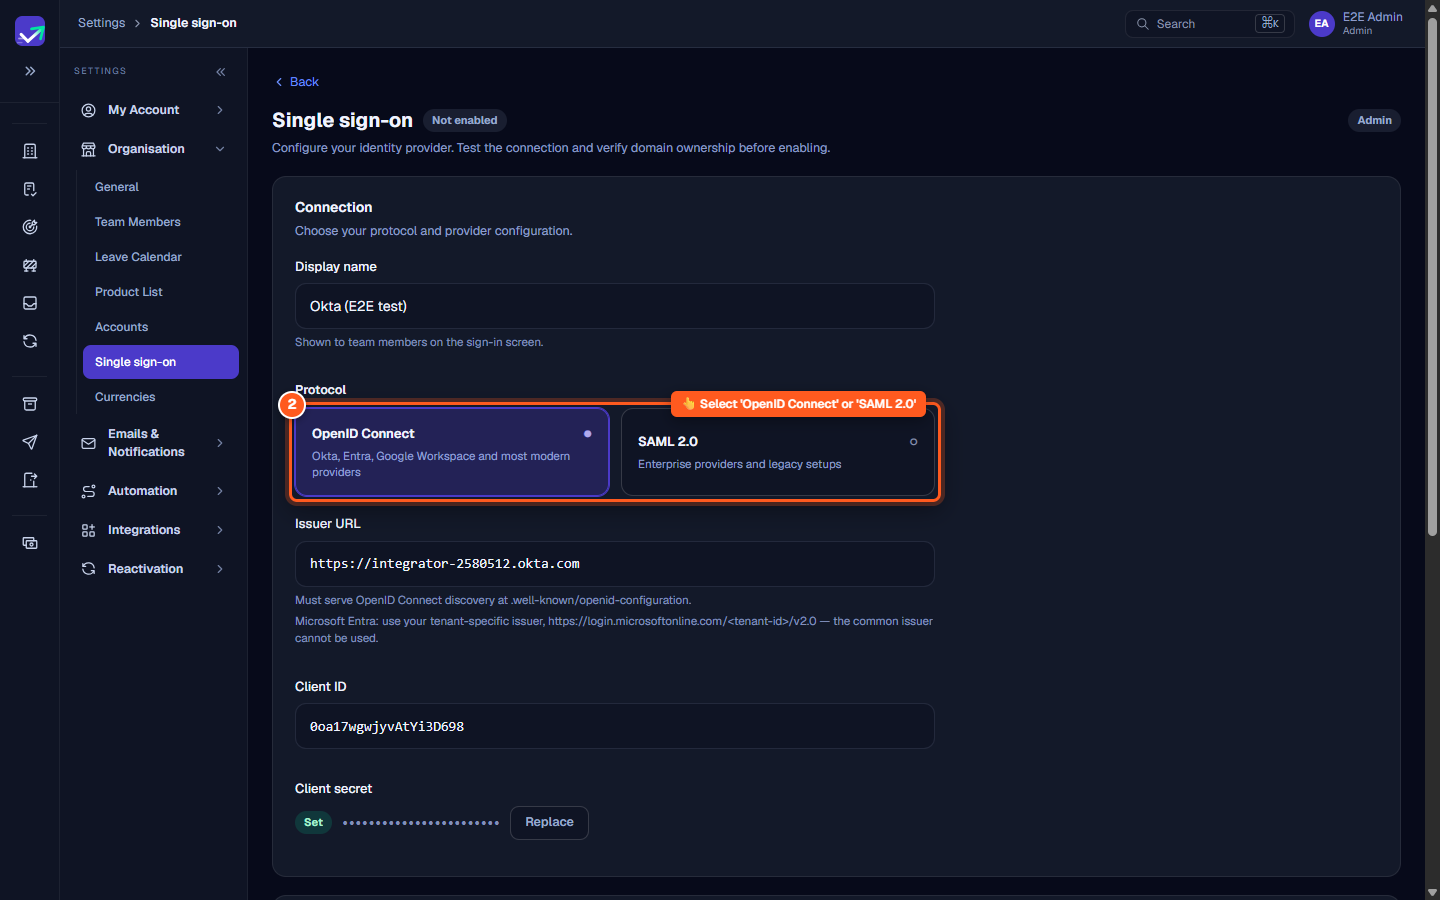
ValueRamp supports OpenID Connect and SAML 2.0:
OpenID Connect
For Okta, Microsoft Entra ID, Google Workspace and most modern providers:
- Display Name: The friendly label shown to teammates on the sign-in screen (e.g.,
Okta (Corporate)). - Issuer URL: The discovery endpoint serving OpenID Connect metadata at
/.well-known/openid-configuration. For Microsoft Entra ID, use your tenant-specific issuer (https://login.microsoftonline.com/<tenant-id>/v2.0) — the sharedcommonissuer cannot be used. - Client ID & Client Secret: The OAuth application credentials generated within your IdP console.
SAML 2.0
For enterprise providers and legacy setups, select SAML 2.0:
- IdP metadata: give your identity provider's metadata, either as a Metadata URL (ValueRamp refreshes the certificates from it every night) or by choosing Paste XML. The entity ID and signing certificates are read from the metadata — you don't type them in.
- Give these to your IdP: copy the Entity ID (Audience), ACS URL and Metadata URL shown in this panel into your identity provider's application settings, along with the Signing certificate if your provider asks for it.
- Attribute mapping: the Email attribute defaults to NameID. Change it only if your provider sends the email in a different attribute.
Proving Domain Ownership via DNS
To ensure that only authorized domain administrators can route team logins, every email domain associated with your connection must be verified via DNS:
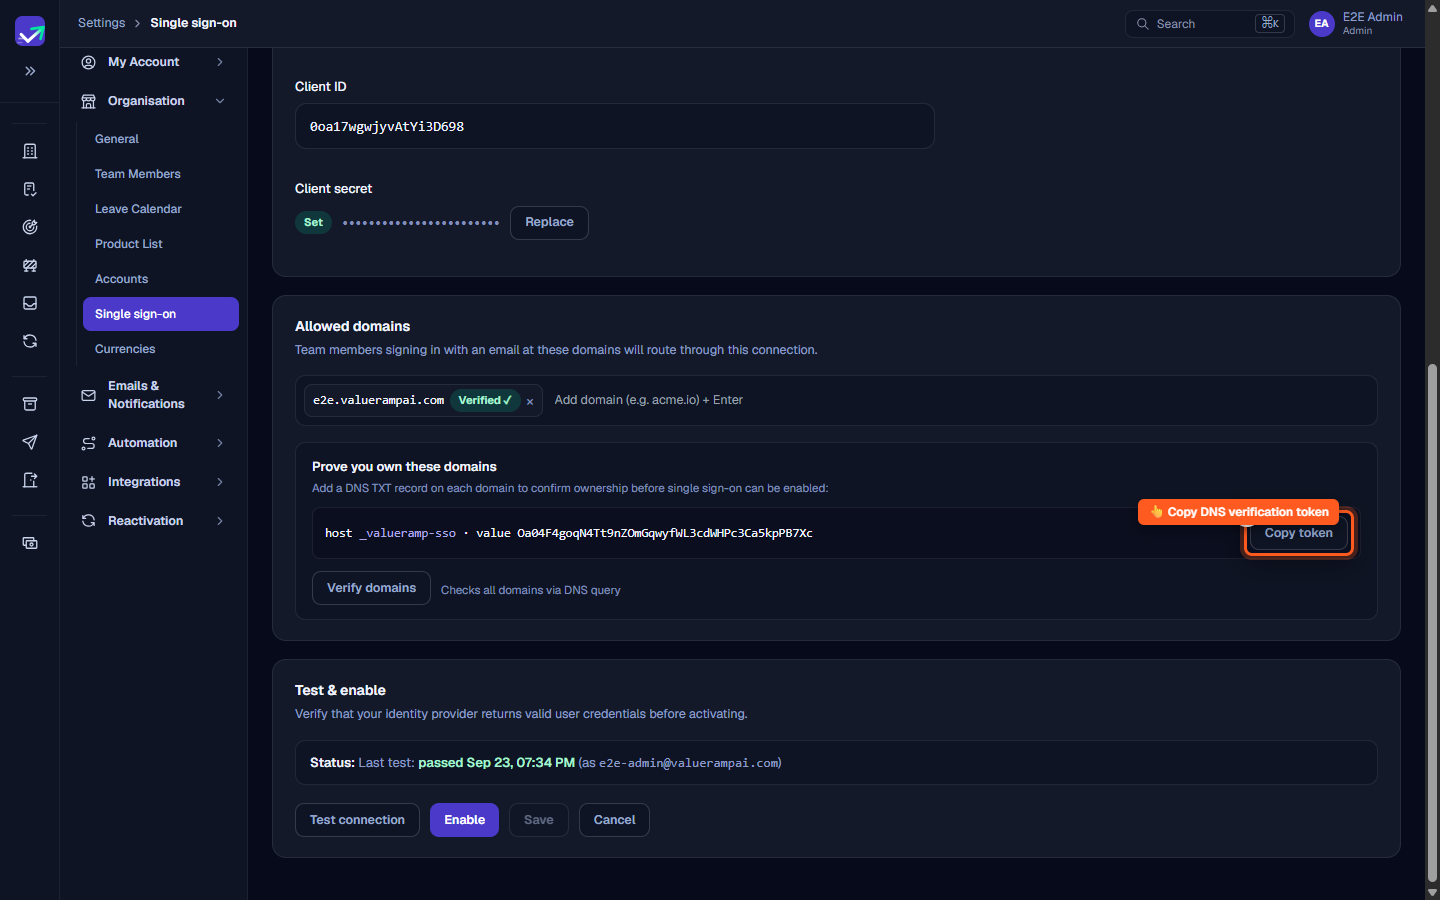
- Under Allowed domains, enter each corporate domain (e.g.,
acme.com) and press Enter. - In the Prove you own these domains section, locate the host and token values.
- In your DNS management console, create a TXT record on your domain:
- Host / Name:
_valueramp-sso.<your-domain>(or_valueramp-ssodepending on your DNS provider) - Type:
TXT - Value: The alphanumeric token provided in the ValueRamp interface (e.g., click Copy token).
- Host / Name:
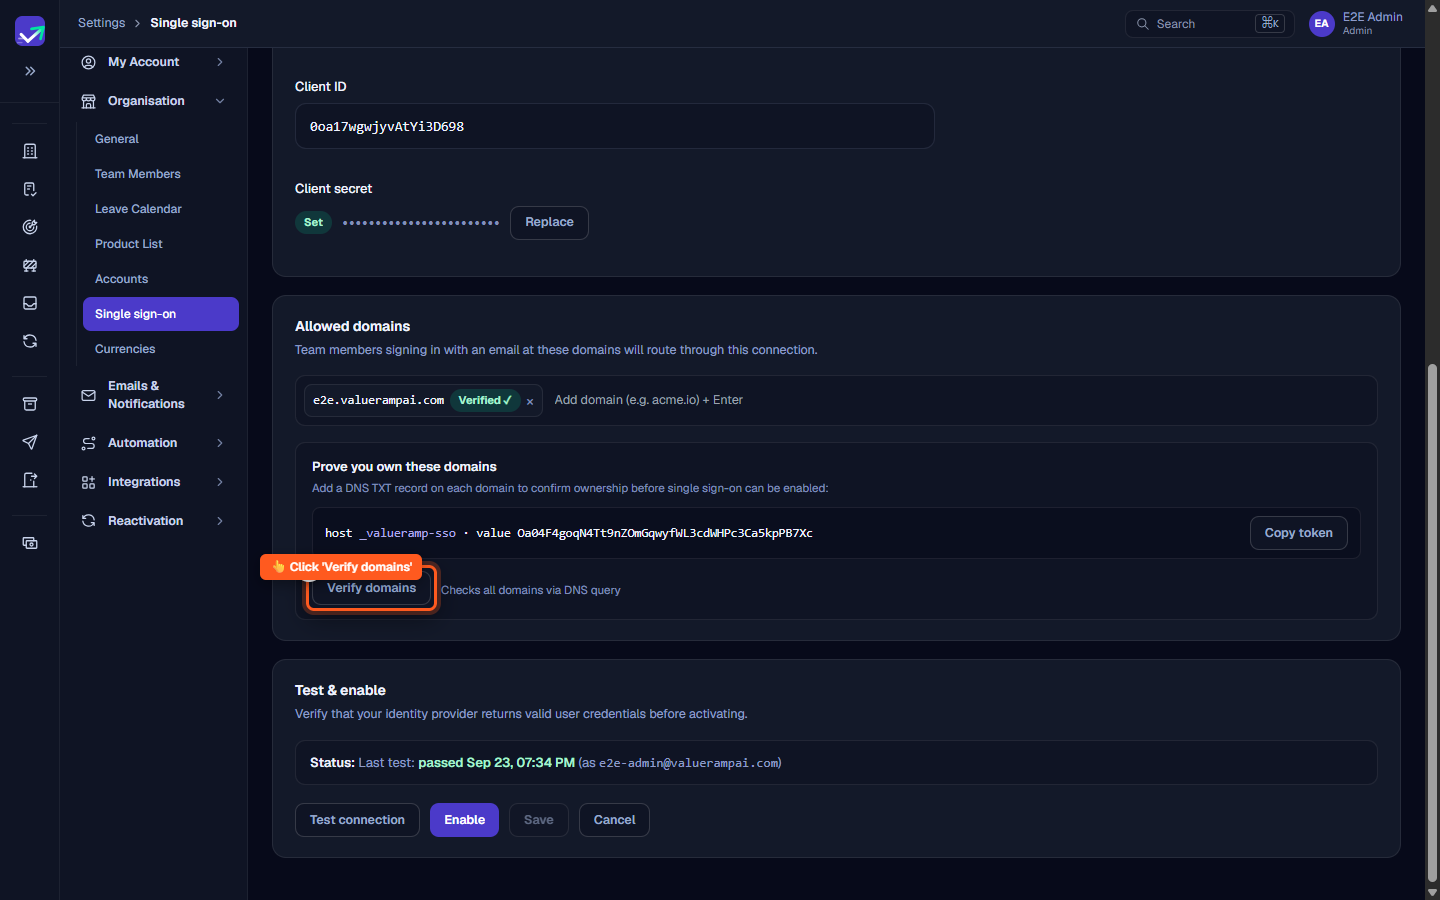
- Once your DNS host publishes the record, click Verify domains. ValueRamp queries the DNS records immediately and displays a green
Verified ✓badge next to confirmed domains.
Standing Security Check: ValueRamp runs automated background checks against all verified domains every night. If a TXT record is removed, your workspace enters a warning grace period (
TXT missing · N days left). If the record is not restored before the countdown completes, single sign-on is automatically deactivated to safeguard workspace security.
Testing and Enabling Connection
Before activating SSO across your organization, you must validate that user claims map accurately:
- In the Test & enable section, click Test connection.
- Your browser goes to your identity provider in the same tab. Sign in using the same administrator account currently logged into ValueRamp.
- Upon returning, the status confirms
Last test: passedwith your timestamp and email. If you authenticate with a different email, ValueRamp reports an identity mismatch error. - Click Enable. The connection switches to Enabled, and teammates with email addresses at your verified domains can now sign in using single sign-on.
Staff Enforcement Policy
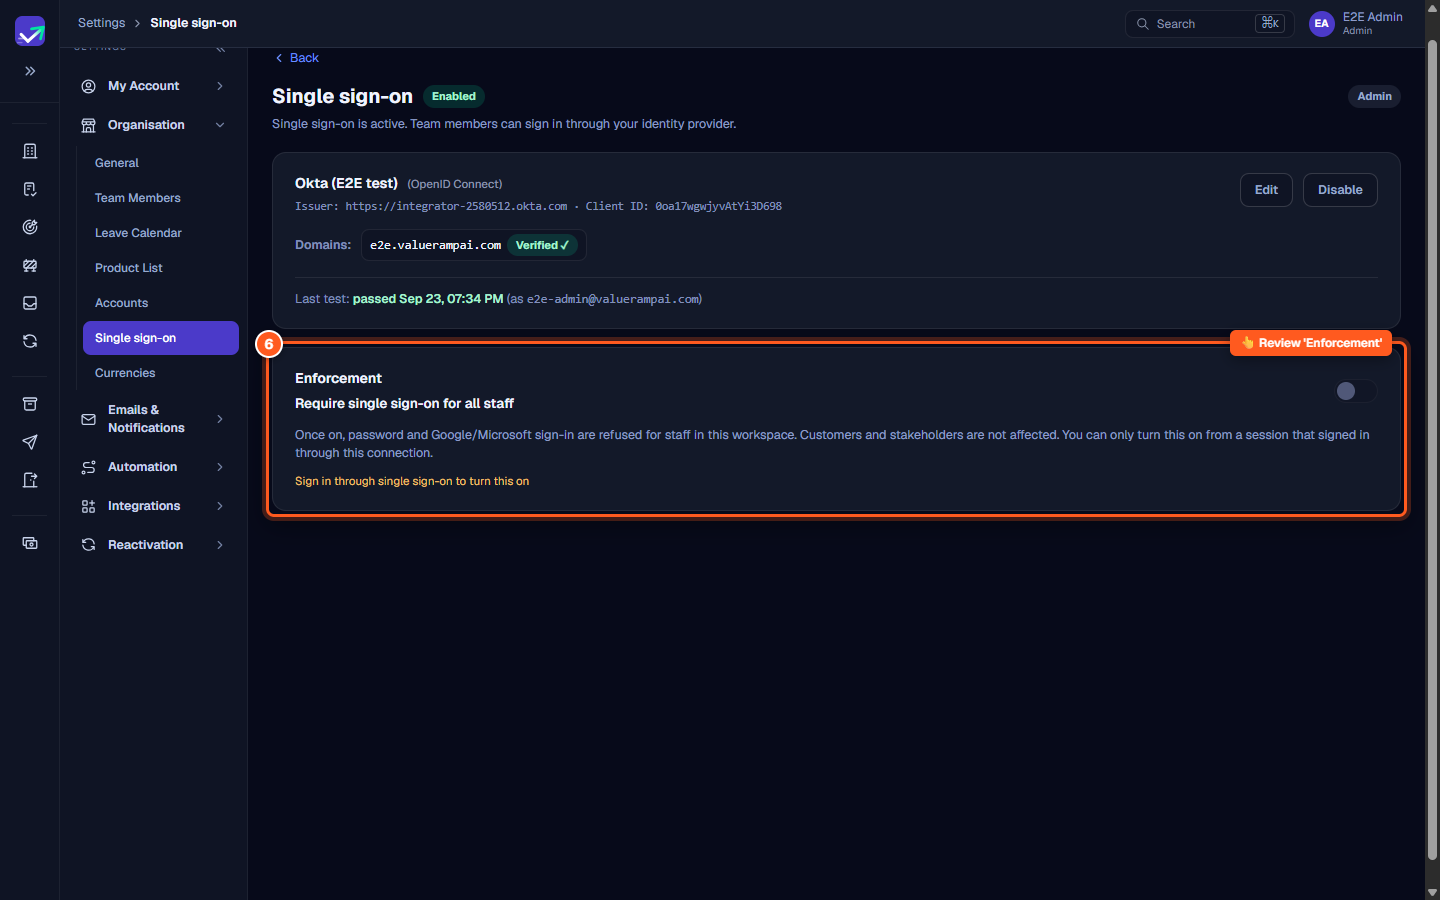
Once single sign-on is enabled, Admins can optionally enforce mandatory IdP authentication:
- When Require single sign-on for all staff is enabled, standard email/password logins and direct Google/Microsoft buttons are refused for internal staff in your workspace.
- Session Requirement: You can only turn on enforcement from an active session that authenticated through this SSO connection. This invariant prevents Admins from accidentally locking themselves out.
- Customer & Stakeholder Protection: Enforcement applies strictly to internal team members. External customer users and client stakeholders collaborating in the customer portal continue to sign in with their standard authentication methods.
To learn how teammates log in once SSO is enabled, refer to the Sign in with single sign-on guide.
Steps
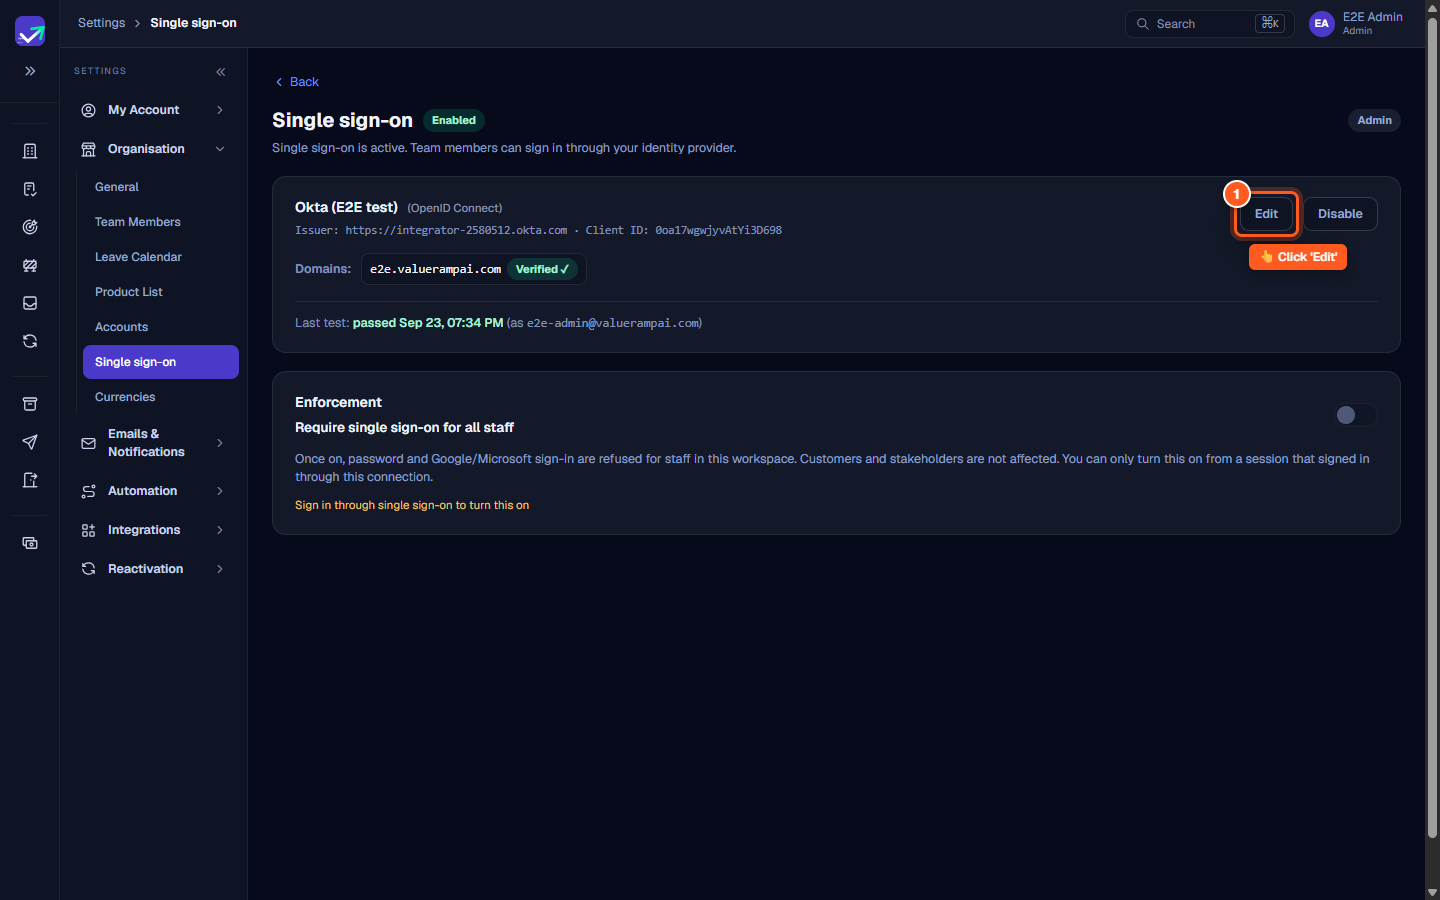
Click 'Edit' to configure single sign-on connection settings
Select your protocol and enter provider discovery credentials
Add allowed email domains and copy the DNS TXT verification token
Click 'Verify domains' to validate DNS TXT record ownership
Run 'Test connection' to authenticate, then click 'Enable'
Review the staff enforcement policy and require IdP sign-in
Common questions
Which plans include Single Sign-On?
Which identity provider protocols are supported?
What DNS record is required to verify domain ownership?
Why must the Admin test sign-in with their own account?
What happens if a domain's DNS TXT record is removed?
How does staff enforcement affect external customers and stakeholders?
Can a new teammate sign in through SSO without an invite?
Was this helpful? Tell us what was missing